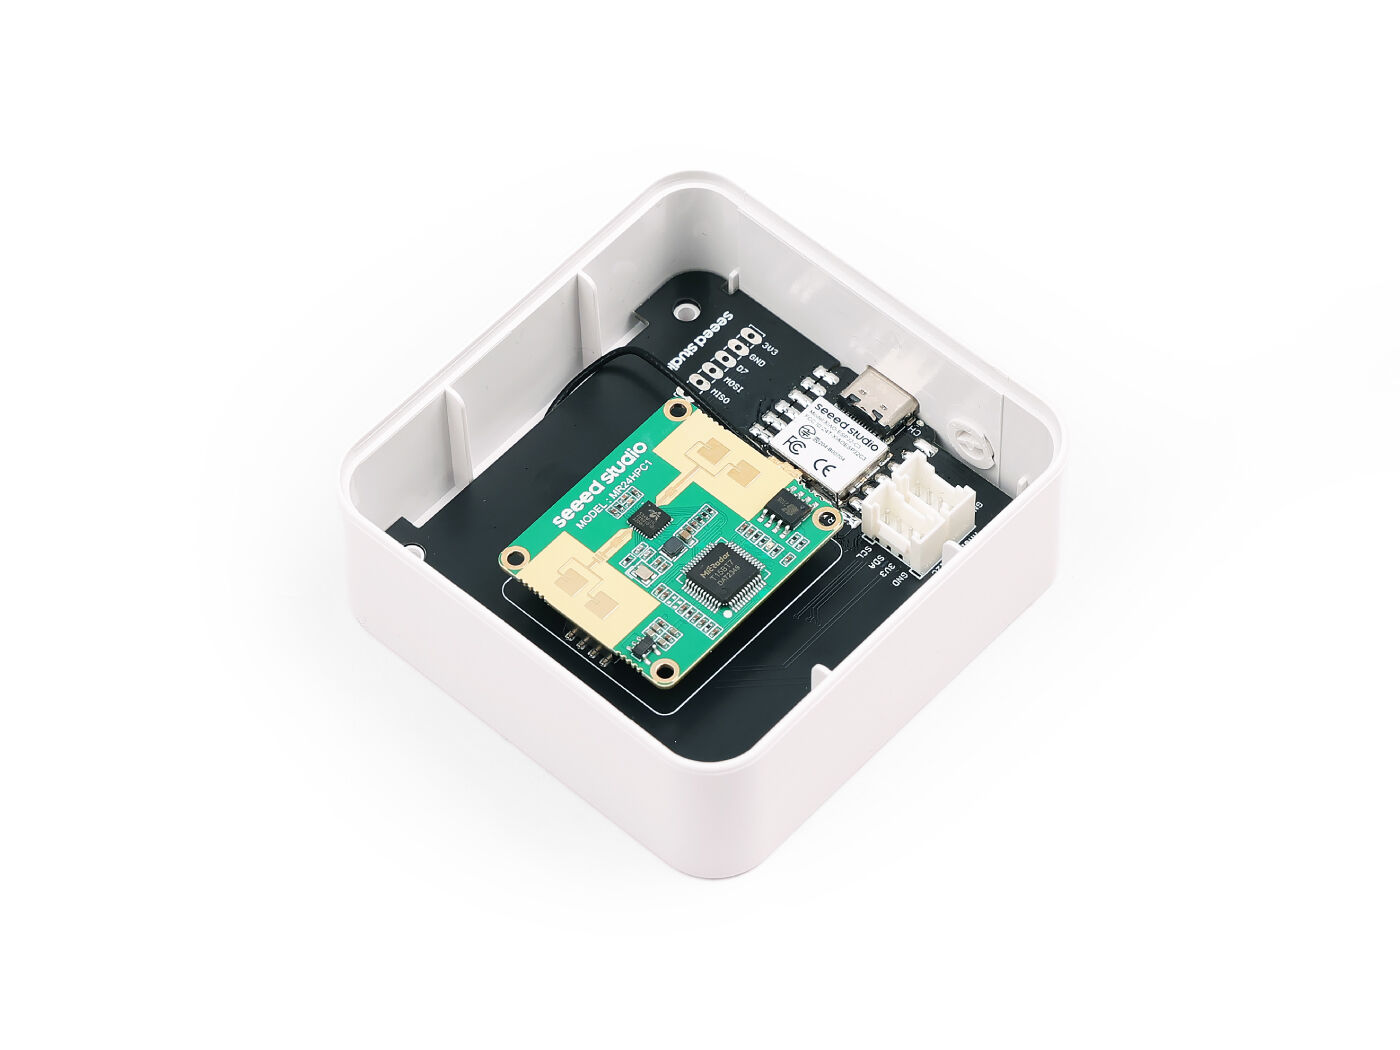
About Seeed Studio MR24HPC1 Kit
Powered by Seeed Studio XIAO ESP32C3, it supports Wi-Fi/BLE connectivity and offers precise human detection via mmWave sensors. Seamlessly connect grove modules for added features. Achieve easy setup for Home Assistant within 1-2 minutes, coupled with convenient wireless Over-The-Air (OTA) updates. Enable extensive versatility with replaceable mmWave sensors. Ideal for customize smart home automation, detect intrusions, and monitor the well-being of the elderly.
Installation
You can use the button below to install the pre-built firmware directly to your Seeed Studio mmWave Kit - MR24HPC1 via USB from the browser.
Then, refer to the tutorial here to complete the subsequent steps:
https://wiki.seeedstudio.com/mmwave_human_detection_kit/
Step 1. Powering the kit
Please supply power to the kit via a USB-C type cable. Be careful that the power input does not exceed 5V/1A, otherwise the product may be damaged.
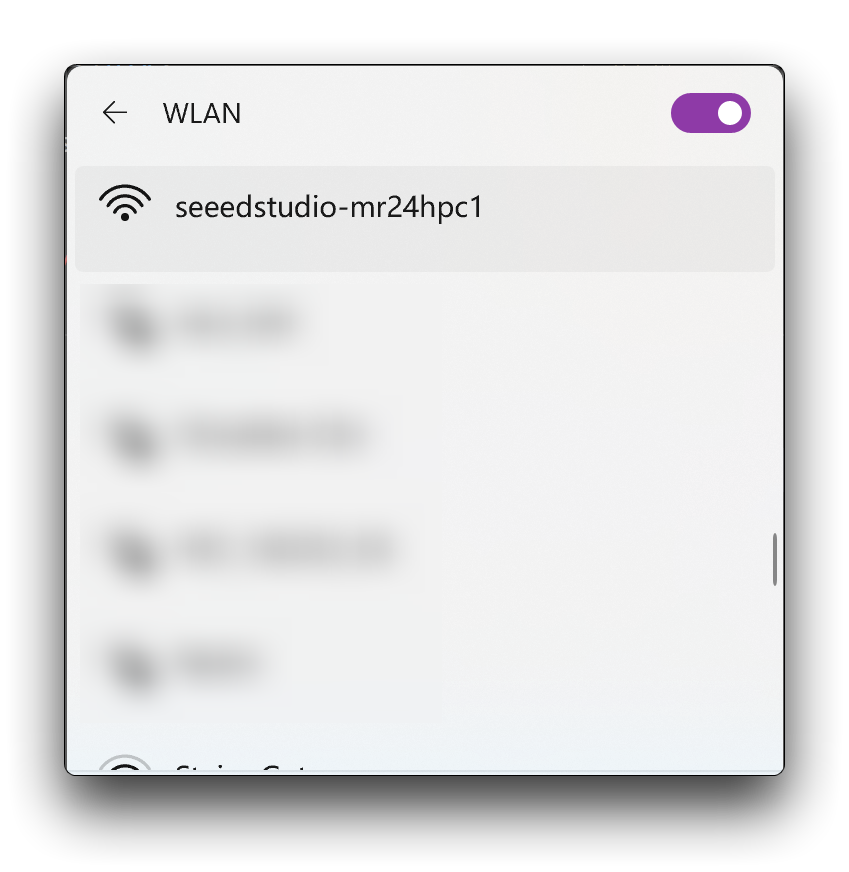
Step 2. Connect to the kit’s hotspot “seedstudio-mr24hpc1”
After the kit is powered on, a hotspot named seedstudio-mr24hpc1 will be opened automatically, please search and connect to the hotspot. You can use your cell phone to connect to this network so you don’t have to switch networks on your computer as often.
Then use your browser to go to the backend administration address: 192.168.4.1. This is where we will configure the network and password that the kit needs to connect to.
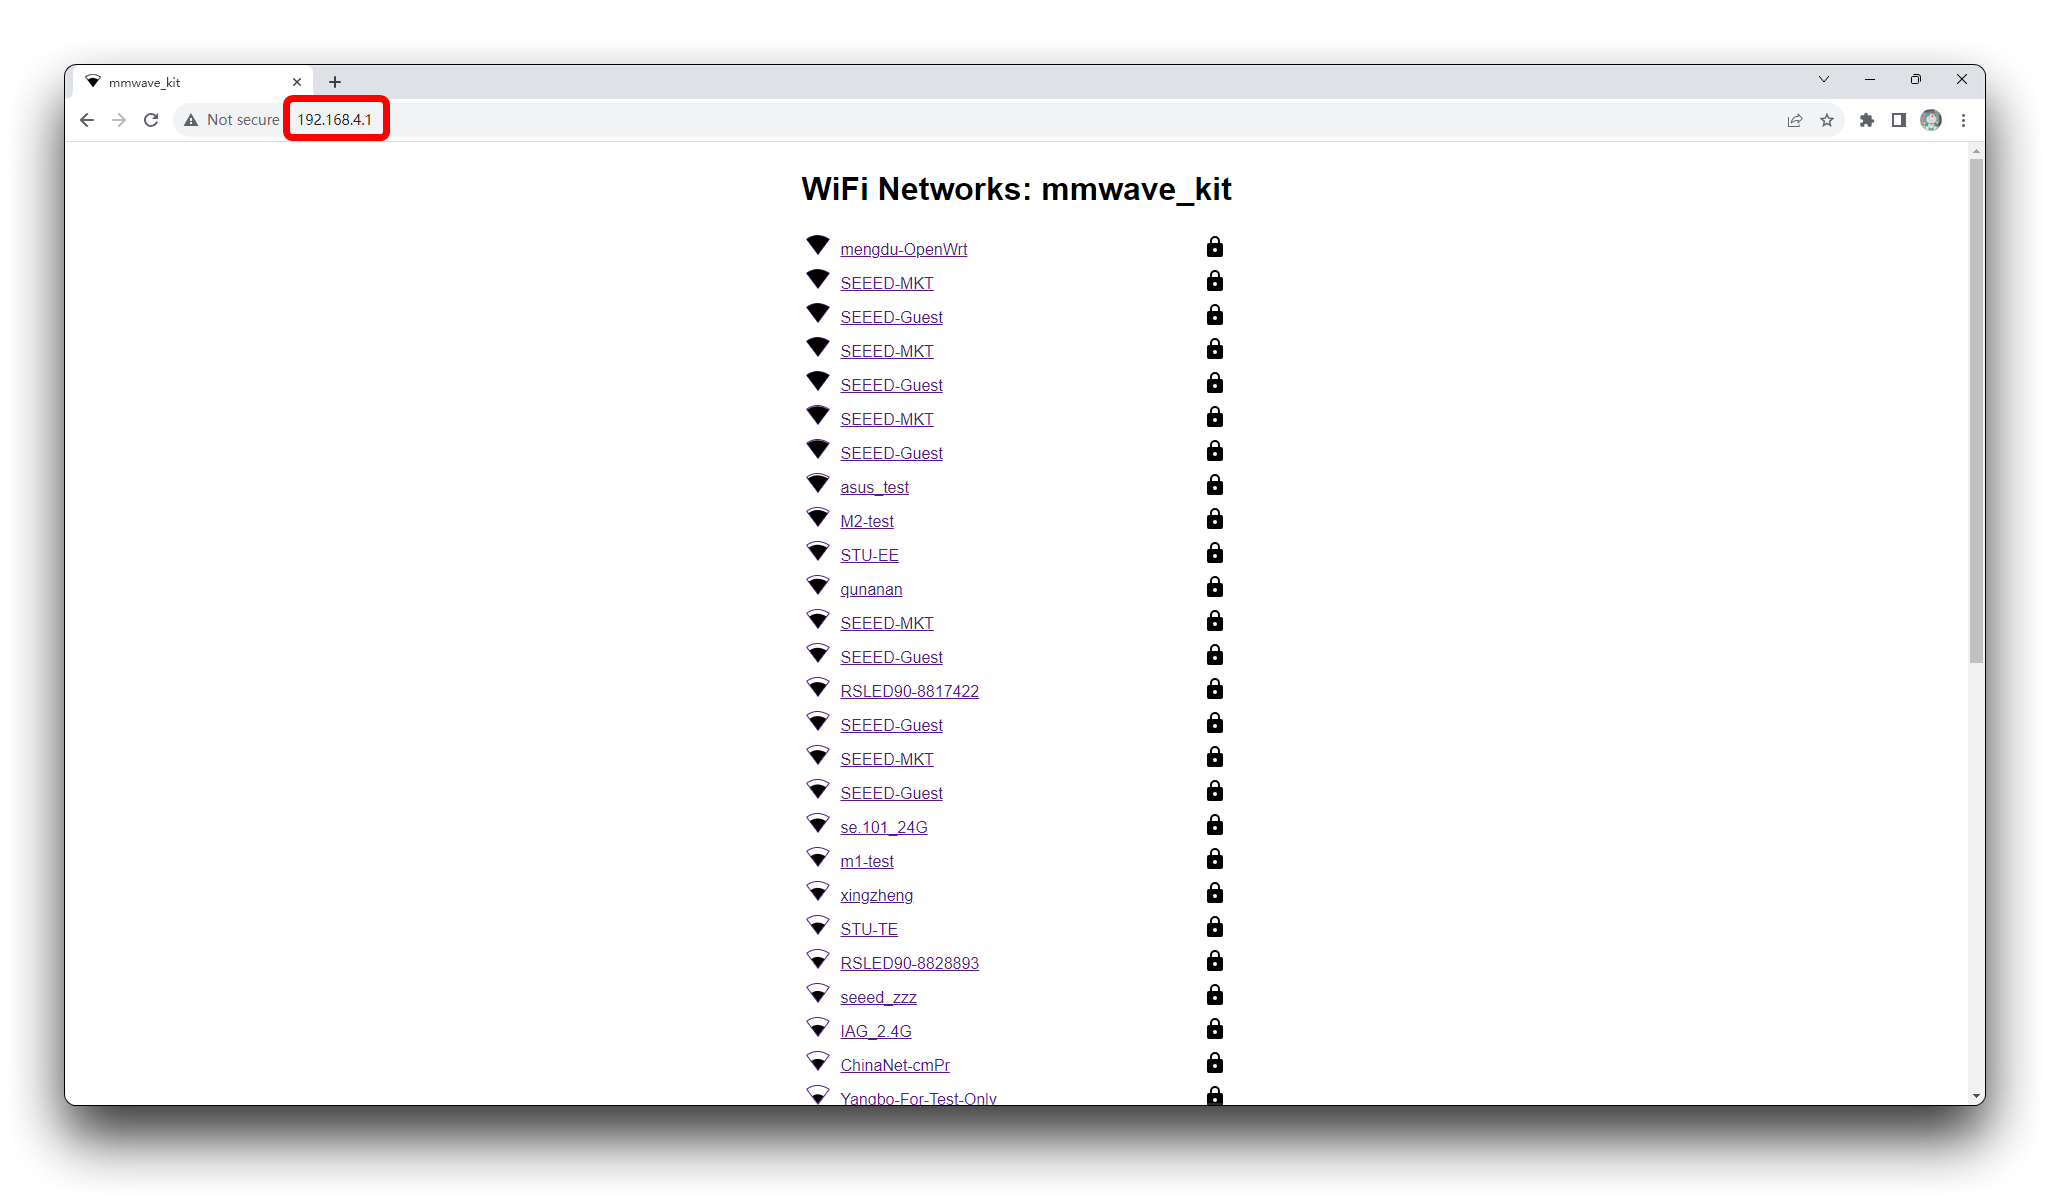
Then, select the name of the network you want the kit to connect to. Please note that the network you select needs to be on the same LAN as Home Assitant, otherwise your kit will not be recognized by Home Assitant searches.
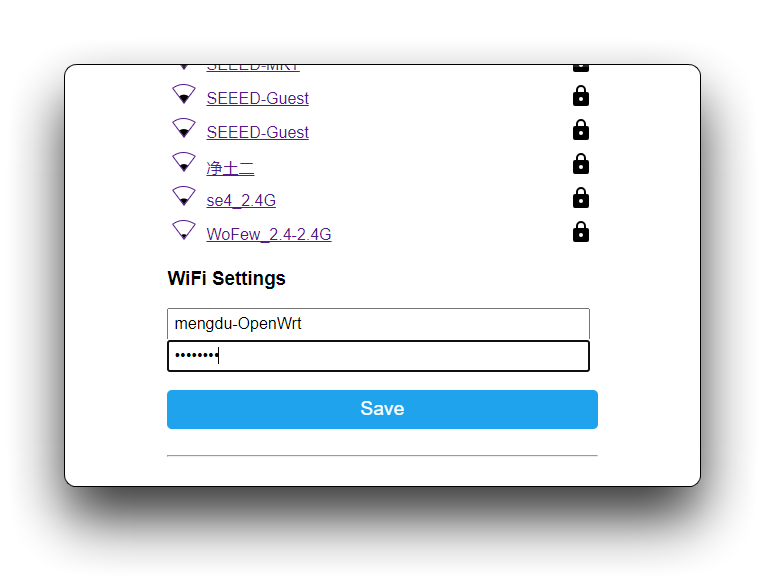
If you can’t find the network you want to connect to on the page, it’s likely that the XIAO ESP32C3 doesn’t support your network. Please adjust your router yourself to enable maximum compatibility and make sure the network is on the 2.4GHz band.XIAO does not support networks on the 5GHz band.
Enter the correct WiFi password and click Save. The device will automatically reboot and try to connect to the network you configured. You don’t need to stay on this page, you can close it now.
Step 3. Adding your device to Home Assistant
If the networking goes well, you’ll be able to find your device on Home Assistant. Please follow the path below to add your device.

Click Settings in the menu bar and select Devices & services.
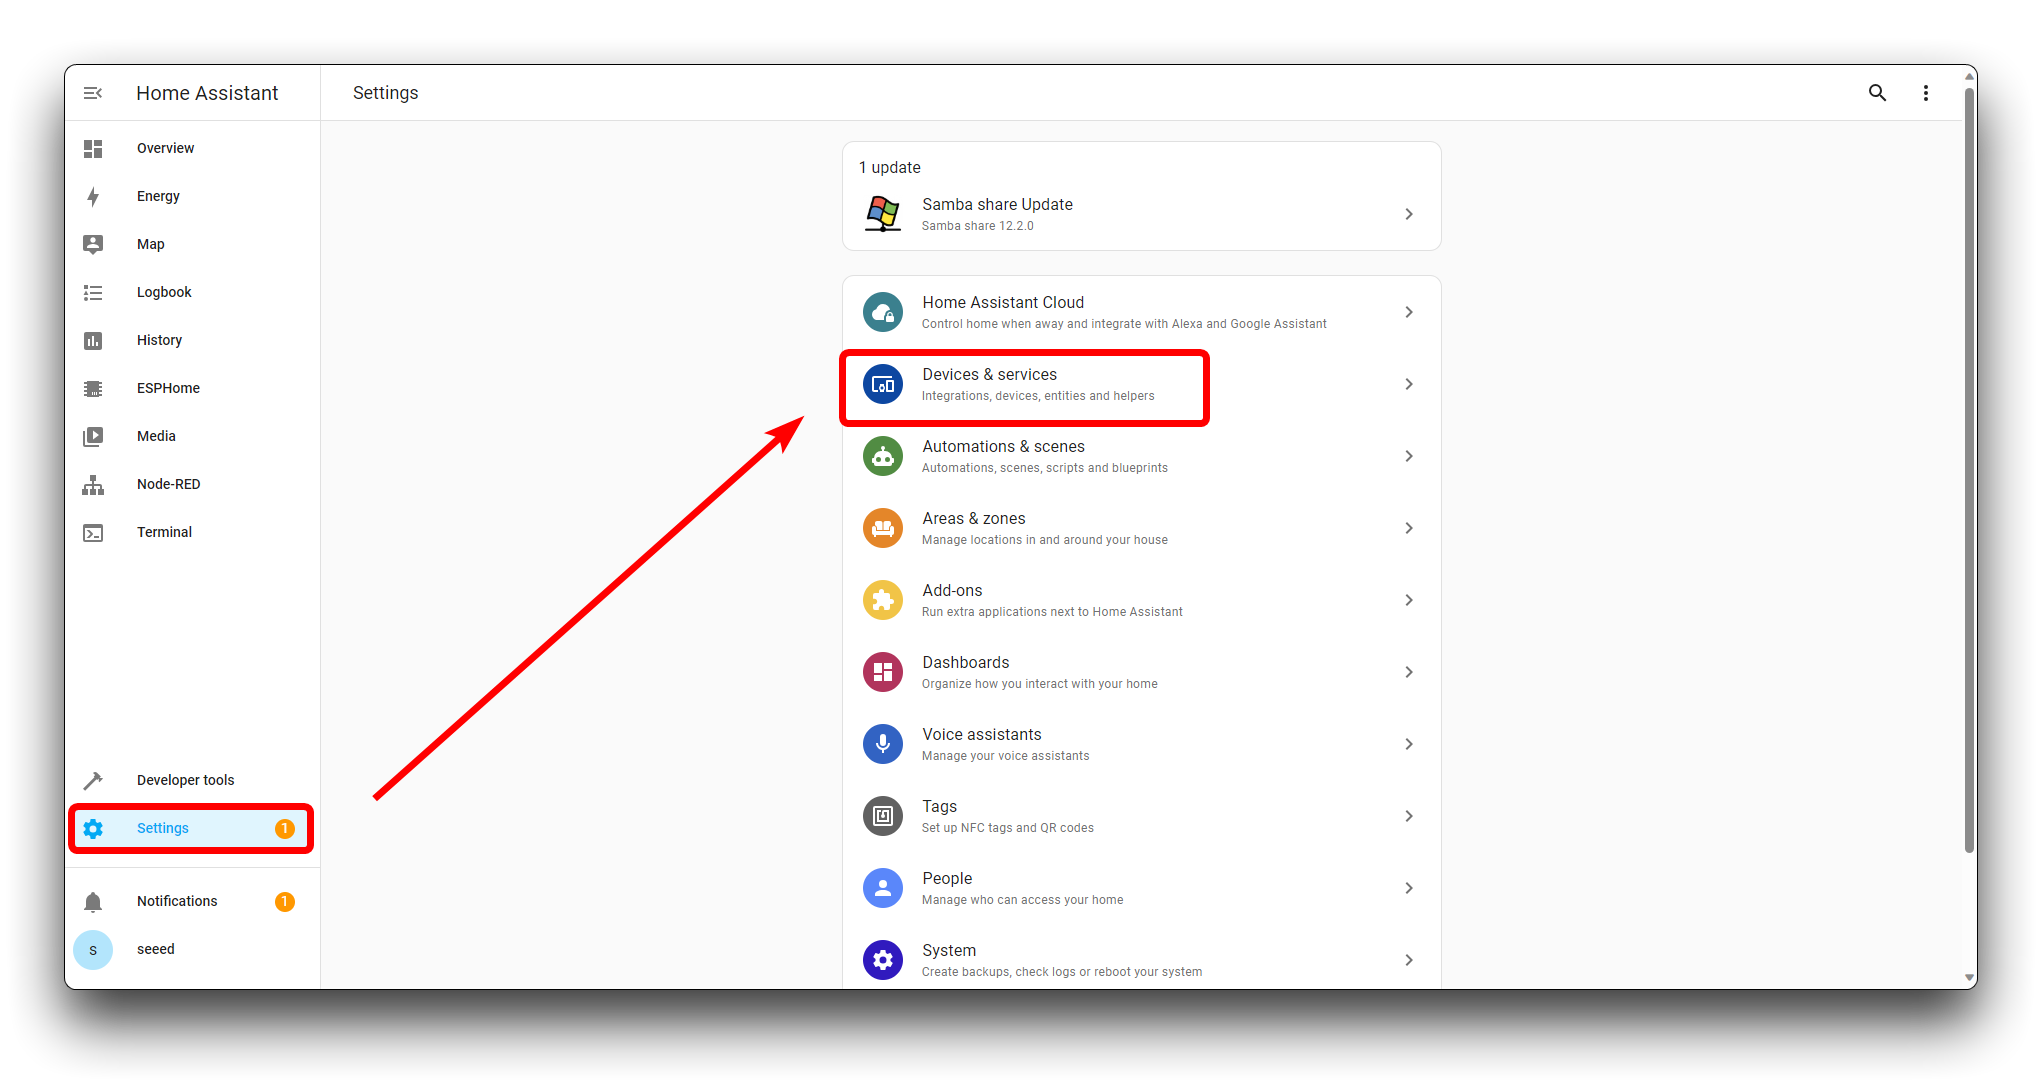
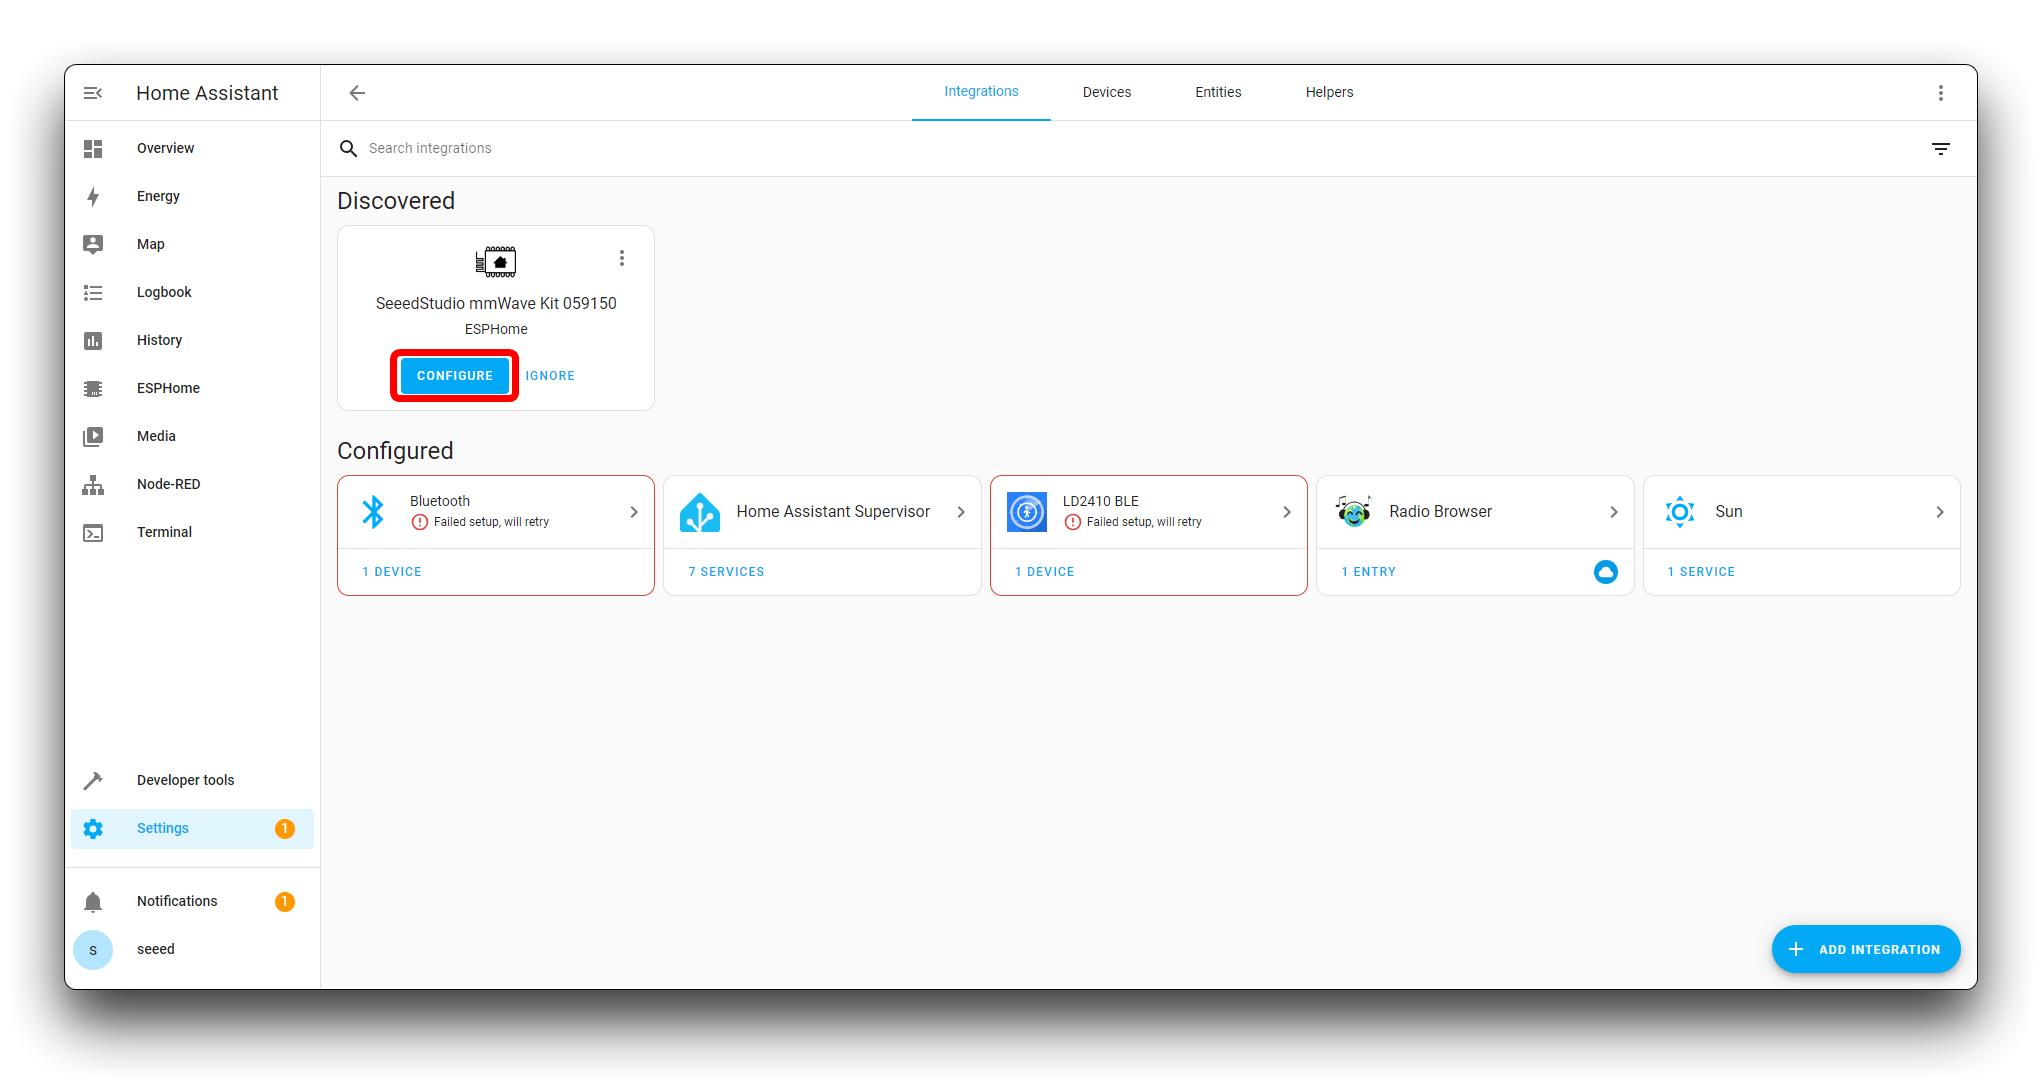
You should see the device appear in the Discovered section, click the CONFIGURE button. Select SUBMIT in the window that pops up afterwards and configure the region to use the device normally.
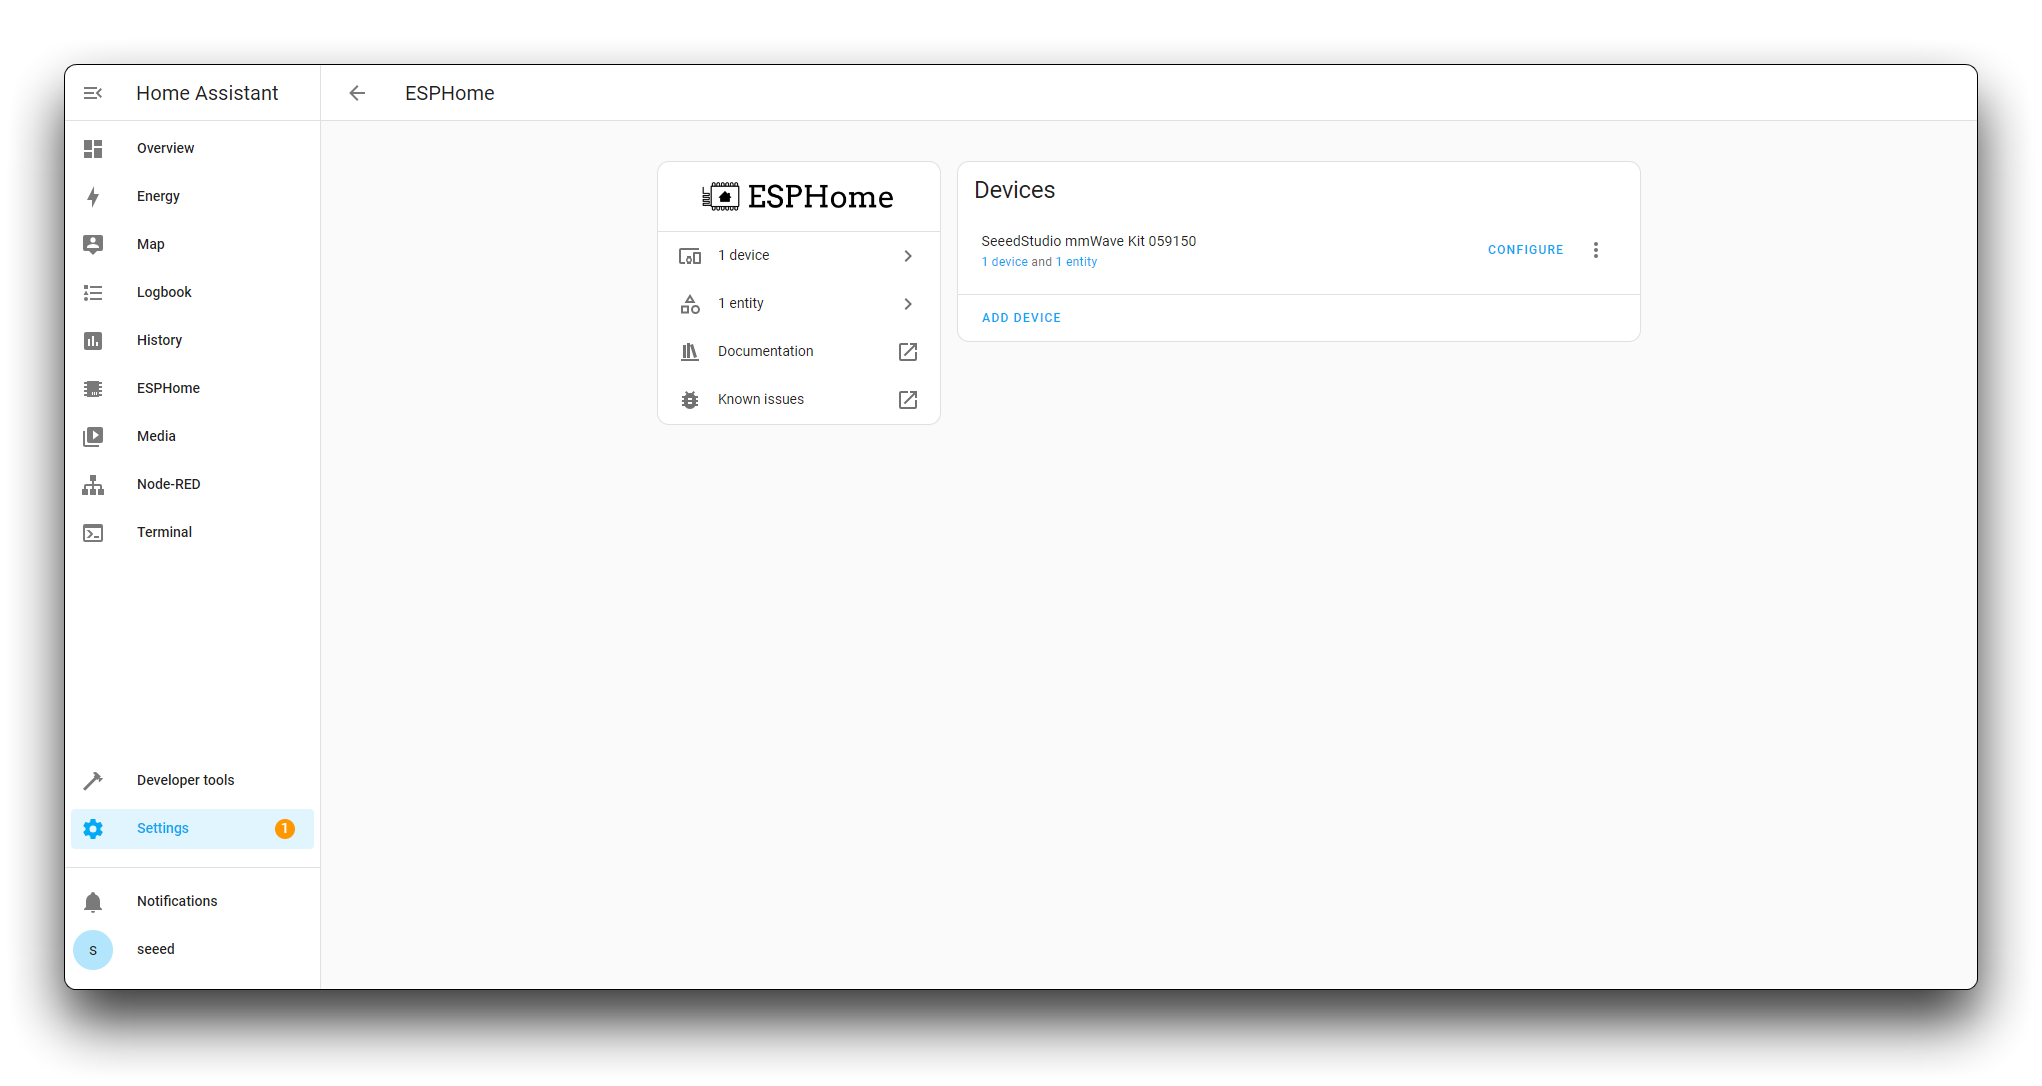
The kit was then successfully added to Home Assistant.
If you have too many devices in your home, there is a certain probability that your device will not be found in Discovered. Then, please get the IP address of the kit from your router’s console, click the Add Integration button at the bottom right corner, and manually enter the IP address to add the device.
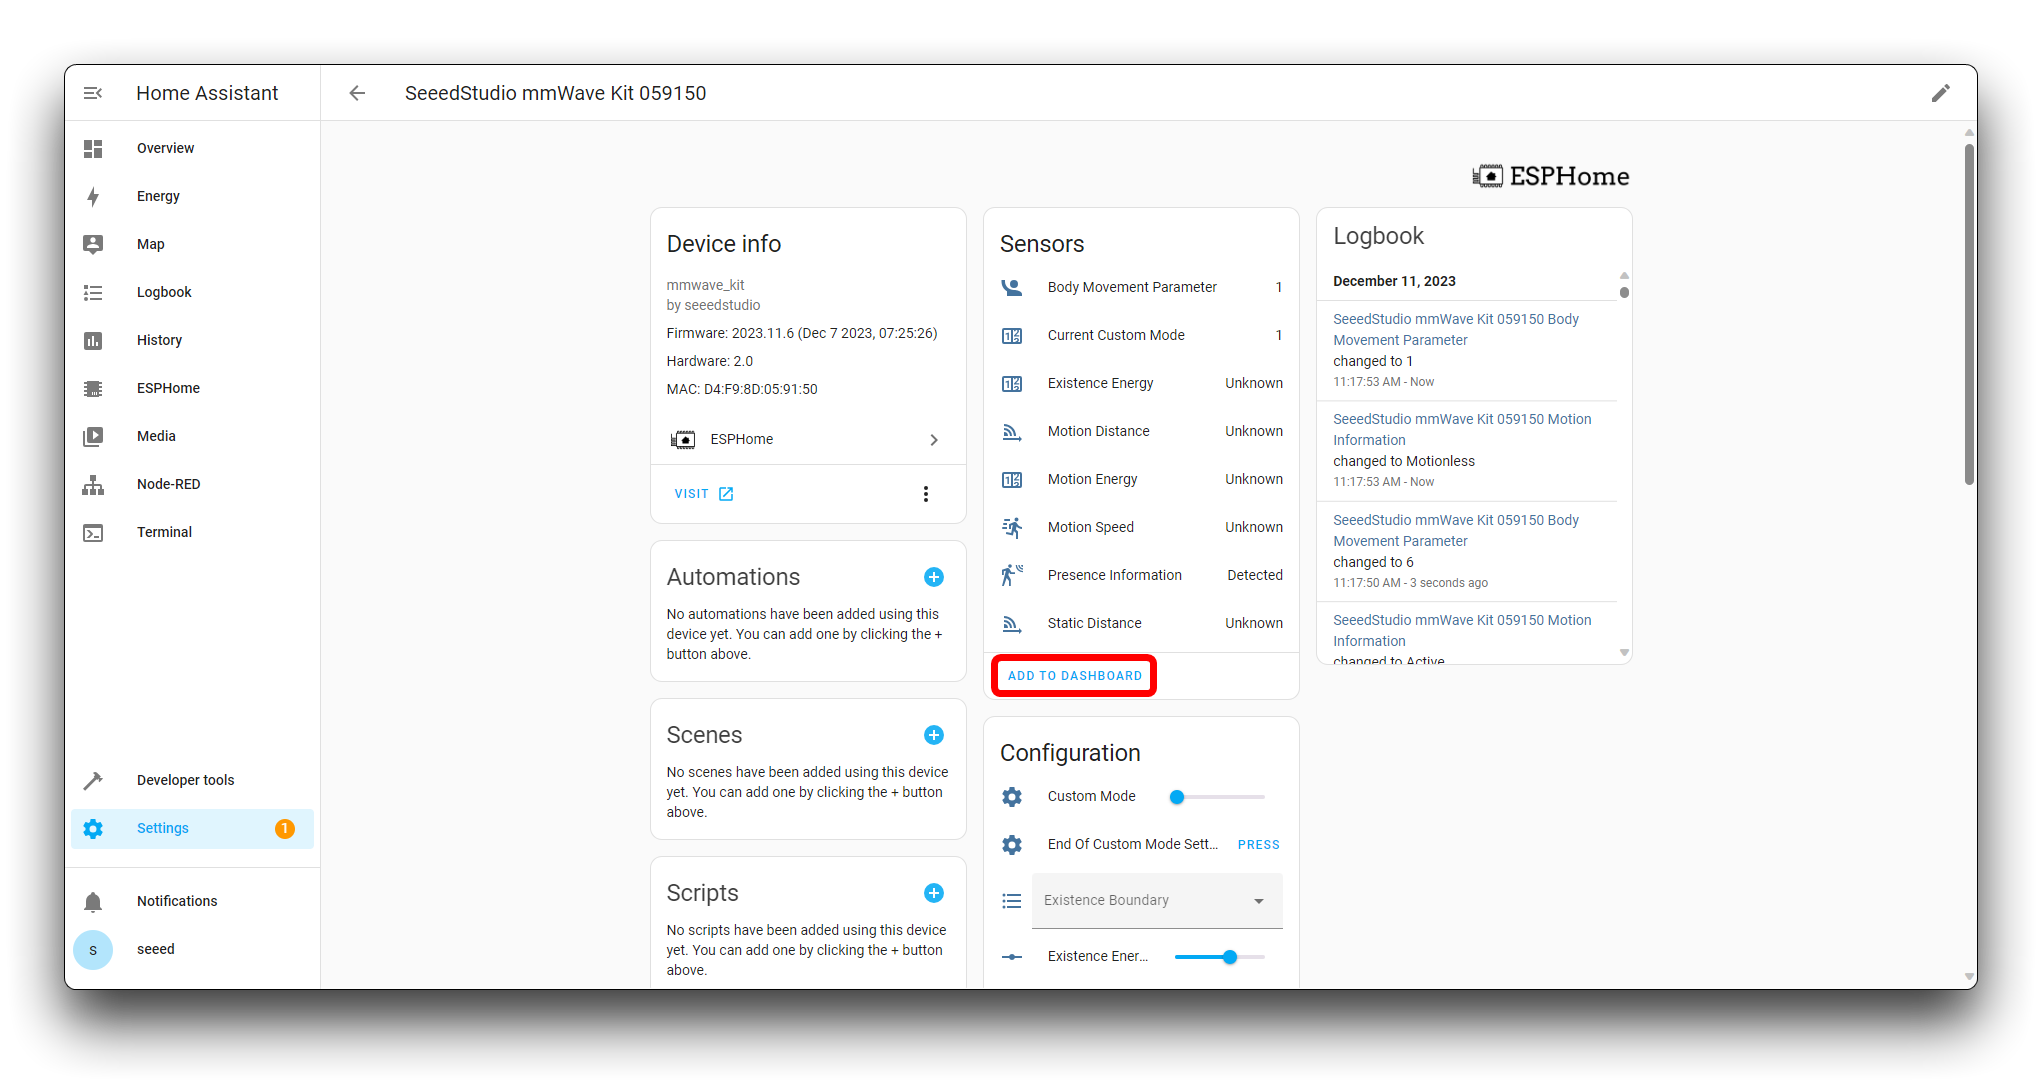
Step 4. Adding components to the dashboard
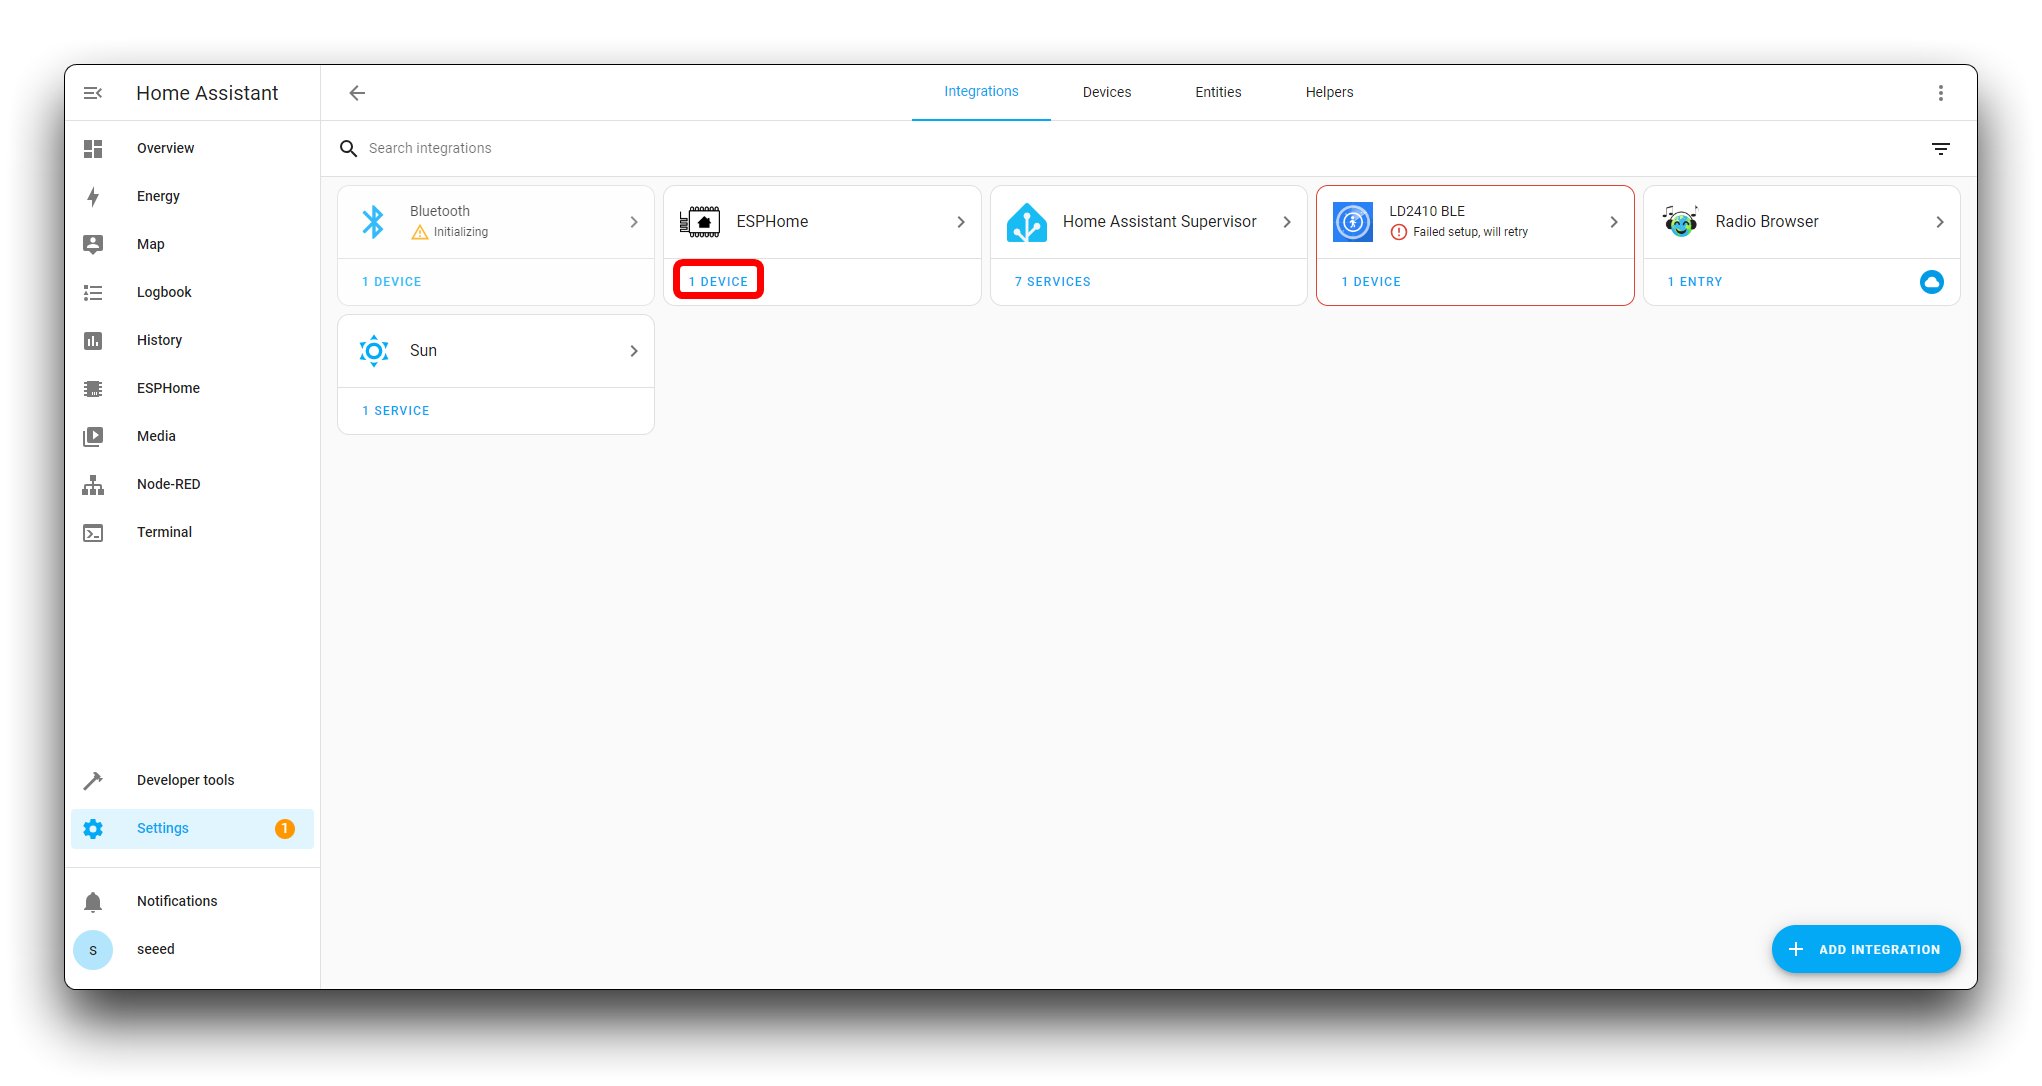
Then, we click on the added ESPHome card, 1 device here.
This will show all the component content we have written for the kit. Let’s scroll down the display area slightly to add all of these components to the dashboard.
If you don’t find the components shown under this page, check the kit’s power supply and logs. If you are using the computer function, some computers may not have USB ports that provide enough power support. If you make sure there is no problem with the power supply, please open the logs and send the detailed logs back to Seeed Studio’s technical support.
We can then see all the information and content in Overview.